달력

1

« 2025/1 »

  • 1
  • 2
  • 3
  • 4
  • 5
  • 6
  • 7
  • 8
  • 9
  • 10
  • 11
  • 12
  • 13
  • 14
  • 15
  • 16
  • 17
  • 18
  • 19
  • 20
  • 21
  • 22
  • 23
  • 24
  • 25
  • 26
  • 27
  • 28
  • 29
  • 30
  • 31
728x90
반응형

오늘도 난 전혀 감도 없는 인사이트를 얻기 위해.... 삽질중..^^;;


오늘도 주중에 키움API 실시간 체결창 정보를 MySQL로 저장한뒤

그 정보를 가지고 몇 시간을 요리조리 해보다가..갑자기 드는 자괴감..

이런다고 돈 많이 버나? ㅎ


그래서...

그냥 천천히 하기로 하고 파이썬을 이용해서 간단하게 시각화 해보는 것에 대해서 작성해 본다.

엄청 다양하게 시도해봤지만..딱히 떠오르는 것이 없다.


우선은 내가 좋아하는 Interactive Chart 인 plotly 를 이용하기로 했다.

아! 들어가기전에 키움 API를 이용한 데이터 수집에 대해서는 pass~

간단히 시각화 코드만 만들어봤다.


import plotly.express as px
import plotly.graph_objs as go
import pandas as pd

라이브러리는 저정도만 입력해보 작동 가능 할 것이다.

나의 코드에는 그 외에도 DB를 이용하기 위한 라이브러리, os 등등 너무 잡다하게 있어서 pass


stock_code = '064550'
_dt = '2021-09-10'
day_list = _dt.split('-')

dt_y = day_list[0]
dt_m = day_list[1]
dt_d = day_list[2]
print('검색날짜 :', dt_y, dt_m, dt_d)    

df_stocks_info = stocks_info()
df_tick = tick(dt_y, dt_m, dt_d, stock_code)

위와 같이 정보를 입력하고,

각각 필요한 데이터를 함수를 호출하여 Dataframe 형태로 저장한다..


그 형태는 아래와 같다.

df_stocks_info

stocks_info 는 키움의 종목에 대한 정보들을 담기 위한 것이다. 아직은 코스피, 코스닥 구분 및 종목명만 있다.

추후에 필요하다면 시가총액, 등등 정보 다양한 정보를 받을 것이다.


df_tick

예전과 다르게 키움에서 조금 업그레이드를 했는지 전일동시거래량도 추가된 것을 볼 수 있다.

여기서 잠깐 사족을 좀 달자면..

체결시간의 경우 키움 API 는 HHMMSS 형태의 string 형태인데. MS(밀리세컨드) 시간이 없다.

그래서 상기 표에서도 나와있지만. 단순히 데이터들 정보가 들어오는 순서 그대로 놔뒀다.

키움 API 게시판에 찾아보니

저 체결량 순서는 체결되는 순서 그대로라고 하니.. 뭐 맞겠지???(추후에 확인해봐야지.ㅋ)


우선 간단하게 시간순에 따라서 체결량을 시각화 해봤다.

px 를 이용하여 상단 및 우측에 histogram도 함께 추가하였다.

stock_name = df_stocks_info.loc[stock_code]['NAME']

fig = px.scatter(df_tick, x=df_tick.index, y="VOLUME", color="VOLUME", marginal_x='histogram', 
                 marginal_y="histogram", width=1500, height=1000, title='{} {} 체결창 분석'.format(_dt, stock_name))

fig.show()

바이오니아_체결창.html
6.78MB


위에서 보면 9시 10시 2시 정도에 체결량이 증가 한 것을 알 수 있다.

그리고........음....... 뭐냐? 뭐가 있냐!! 제발 보여달라!!! 나에게 인사이트를 내어달라!!!! ㅠ.ㅠ

반응형

이번에는 모든 데이터를 같은 차트에 넣고 볼려고 한다.

자세한 내용은 구글등에서 plotly multipule axes 등 으로 검색하면 관련 자료들이 많다.

한참 구글링 한 다음 만든 차트

fig = go.Figure()
go.Scatter
fig.add_trace(go.Scatter(x=df_tick.index, y=df_tick['VOLUME'], name="체결량", mode='markers', 
                         marker=dict(size=5, color=df_tick['VOLUME'], line_width=1)))
fig.add_trace(go.Line(x=df_tick.index, y=df_tick['PRICE'], name="체결가", yaxis="y2", line=dict(color='#9467bd')))
fig.add_trace(go.Line(x=df_tick.index, y=df_tick['TURNOVER_RATE'], name="회전율", yaxis="y3", line=dict(color='#d62728')))
fig.add_trace(go.Line(x=df_tick.index, y=df_tick['TRANS_STR'], name="체결강도", yaxis="y4", line=dict(color='#ff7f0e')))
fig.add_trace(go.Line(x=df_tick.index, y=df_tick['PAST_STIME_RATE'], name="전동거", yaxis="y5", line=dict(color='#1f77b4')))

fig.update_layout(xaxis=dict(domain=[0.1, 0.8]),
                  yaxis=dict(title='체결량'), 
                  yaxis2=dict(title='체결가', titlefont=dict(color='#9467bd'), tickfont=dict(color='#9467bd'), anchor='free', overlaying='y', side='left', position=0.05),
                  yaxis3=dict(title='회전율',titlefont=dict(color='#d62728'), tickfont=dict(color='#d62728'), anchor='free', overlaying='y', side='left', position=0.01),
                  yaxis4=dict(title='체결강도',titlefont=dict(color='#ff7f0e'), tickfont=dict(color='#ff7f0e'), anchor='x', overlaying='y', side='right'),
                  yaxis5=dict(title='전동거',titlefont=dict(color='#1f77b4'), tickfont=dict(color='#1f77b4'), anchor='free', overlaying='y', side='right', position=0.85))

fig.update_layout(title_text='{} {} 종합분석'.format(_dt, stock_name), width=1500, height=1200)

fig.show()

xaxis 축의 domain 의 경우 표의 구역을 정의 한다고 보면 될 듯한다.

그리고 거기에 맞춰서 position 을 이용하여 원하는 위치에 넣어주면 된다.


위와 같이 작성하면 아래와 같은 결과를 얻을 수 있다.

이날 바이오니아 종목의 체결량이 많았는지 꽤 무겁다. 용량도 크고..


다른 분들은 저와 같이 삽질하질 마시길...

프로그래밍 공부를 위한 분석인가? 투자를 잘 해서 돈을 벌기 위함 인가???

오늘도 난 고민에 빠진다.... 시간 로스가 너무 많다. 쳇.


728x90
반응형
:
Posted by 패치#노트
728x90
반응형

이전글에서는 decreasing 에 대해서 알아보았구요.

이번에는 순서상 중요한 것이 hoverinfo 가 있겠네요. 한번 알아보도록 하겠습니다.


[링크]

https://plotly.com/python-api-reference/generated/plotly.graph_objects.layout.template.data.html 


property high 

Sets the high values. 

The ‘high property is an array that may be specified as a tuple, list, numpy array, or pandas Series 

Returns 

Return type 

numpy.ndarray 

# high는 고가, 기본적인 데이터라고 보면 됩니다. 이거와 기본적으로 들어가는 것들이 open(시가), close(종가), low(저가)


property highsrc 

Sets the source reference on Chart Studio Cloud for high . 

The ‘highsrc property must be specified as a string or as a plotly.grid_objs.Column object 

Returns 

Return type 

str 

# 이 파라미터 또한 chart studio 에서 쓰는 옵션 인 것 같네요.


property hoverinfo 

Determines which trace information appear on hover. If none or skip are set, no information is displayed upon hovering. But, if none is set, click and hover events are still fired. 

The ‘hoverinfo property is a flaglist and may be specified as a string containing: 

  • Any combination of [‘x’, ‘y’, ‘z’, ‘text’, ‘name’] joined with ‘+’ characters (e.g. ‘x+y’) OR exactly one of [‘all’, ‘none’, ‘skip’] (e.g. ‘skip’) 
  • A list or array of the above 

Returns 

Return type 

Any|numpy.ndarray 

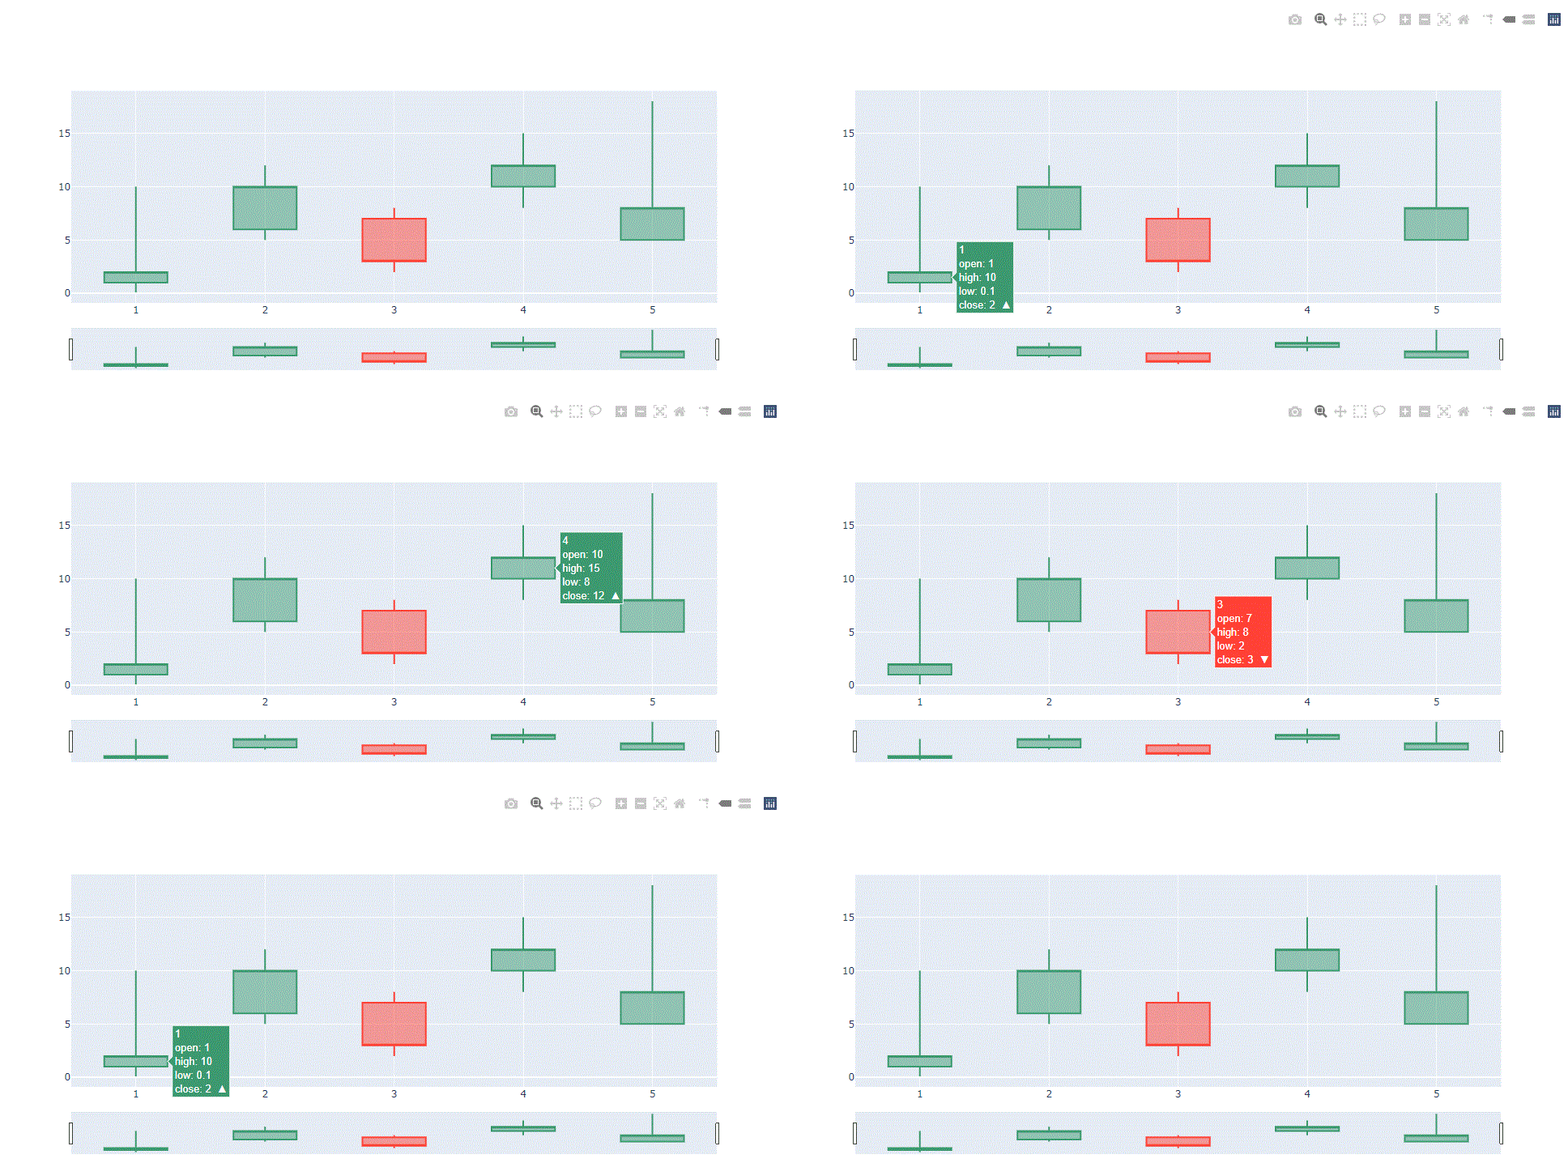
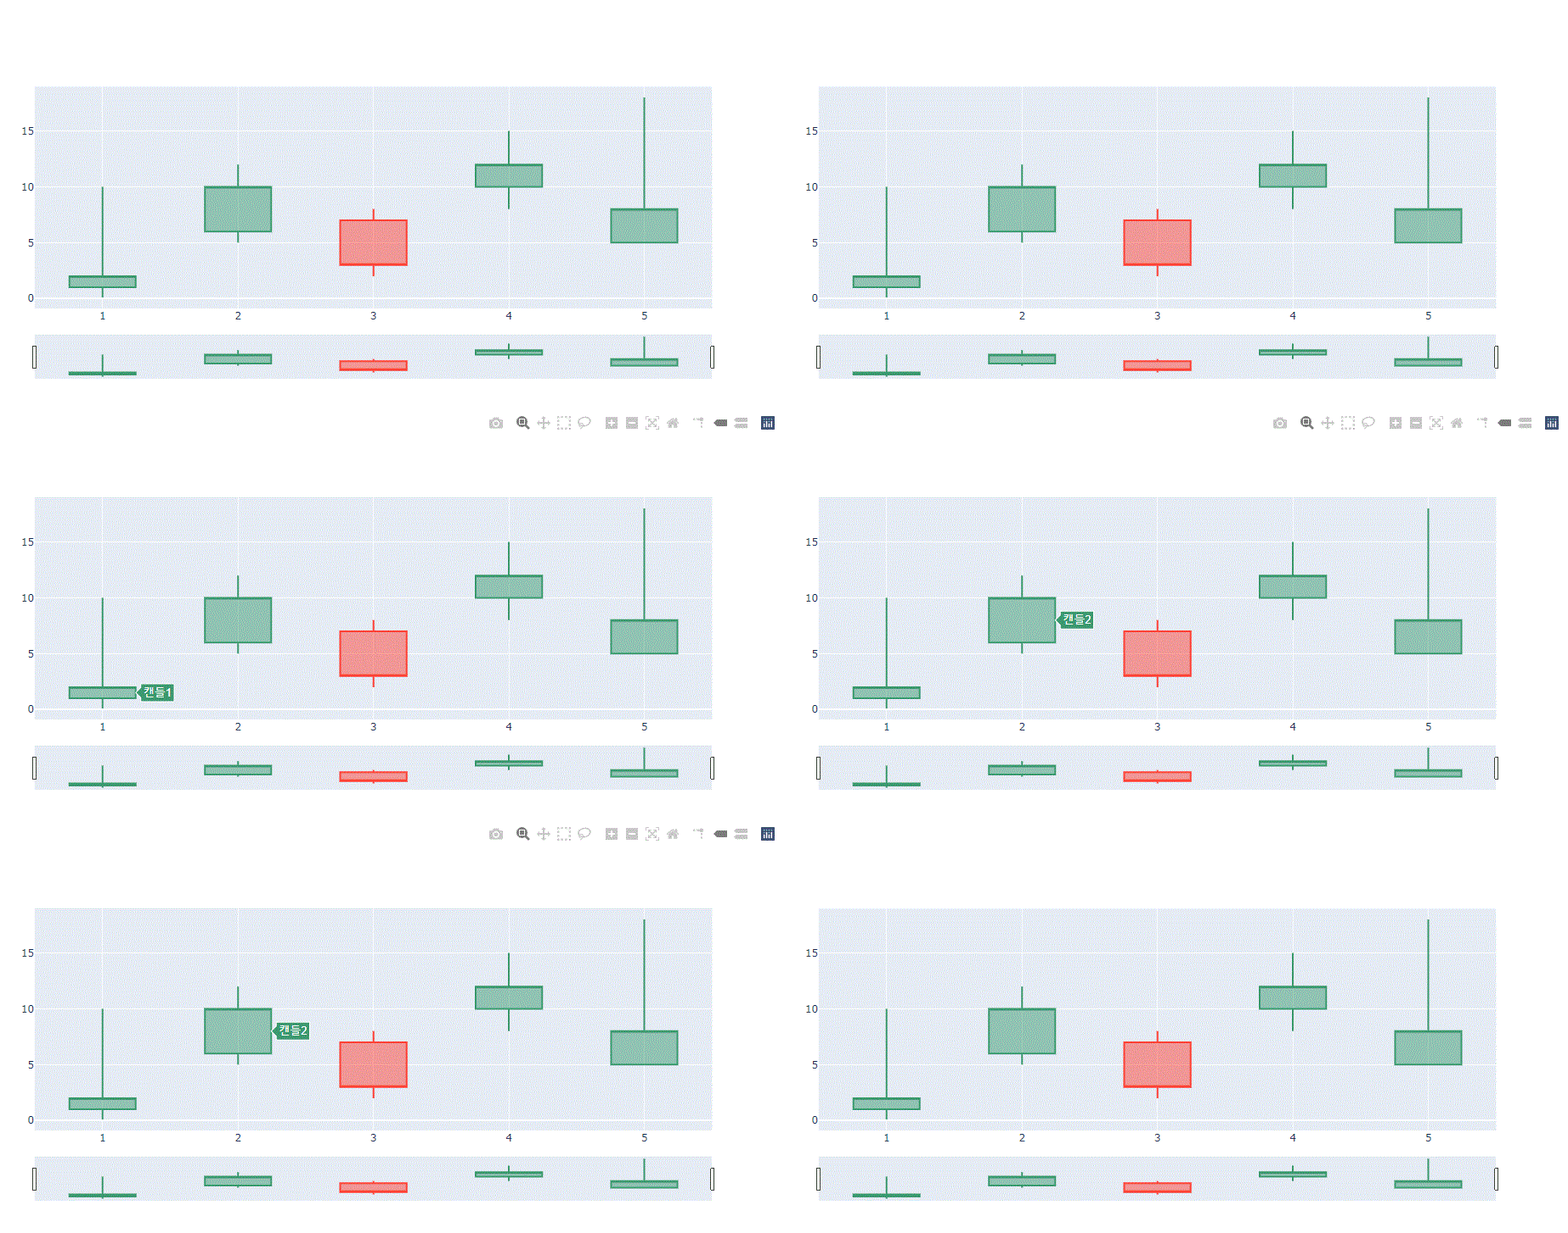
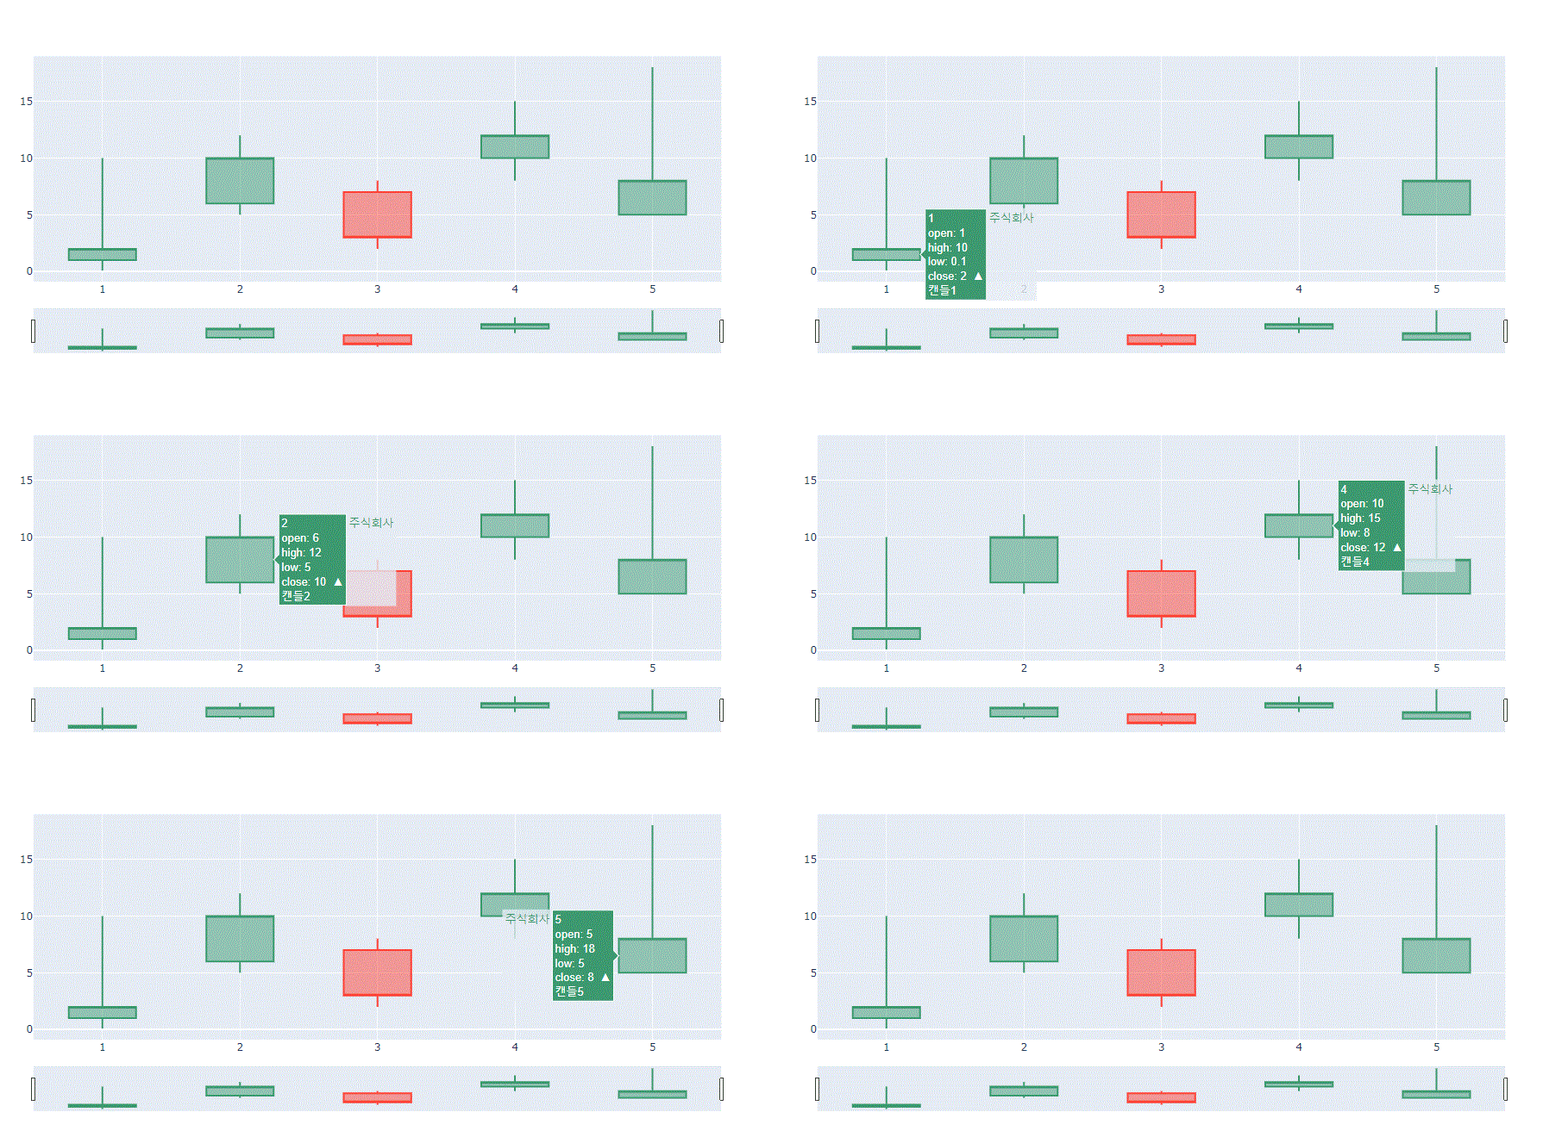
# 이 옵션은 차트를 그려놓은 상태에서 캔들에 마우스를 올리게 되면 띄워지는 옵션이라고 보면됩니다.

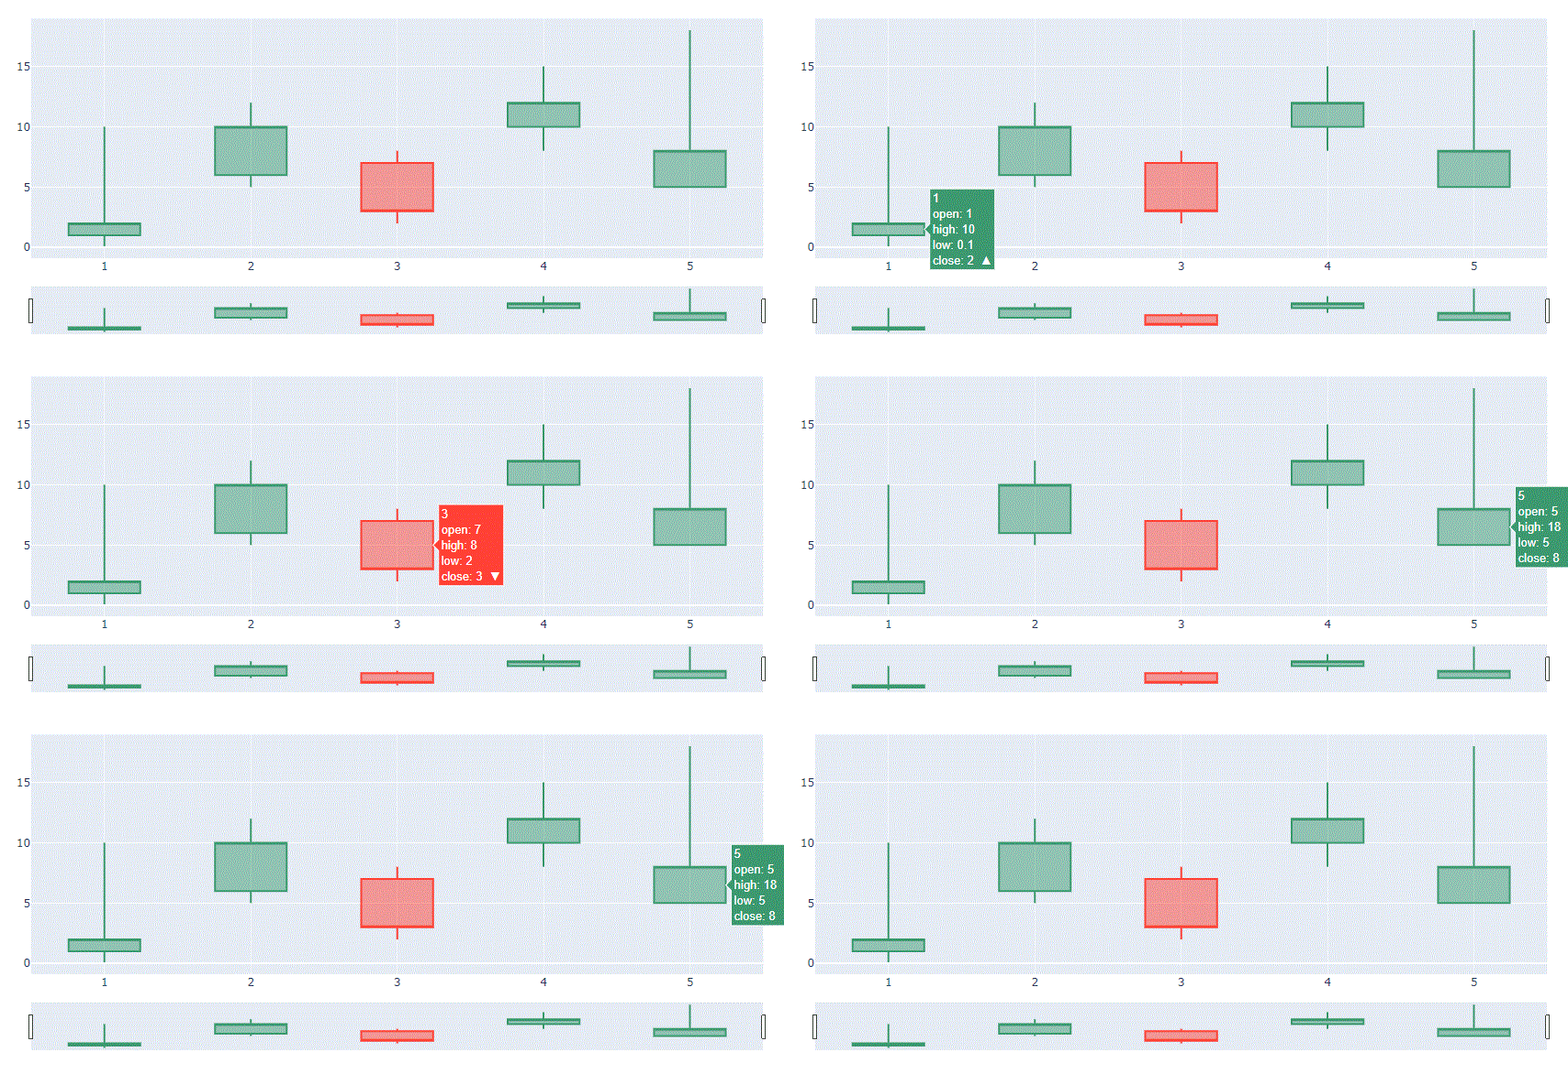
# 기본적인 셋팅은 아래와 같습니다.

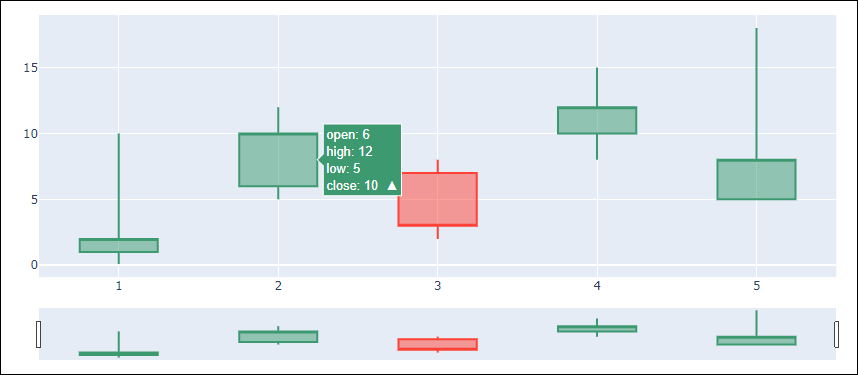
# 마우수를 가져가면 캔들 위로 x 축 레이블, open, close, high, low 값이 뜨게 됩니다.

import plotly.graph_objects as go

fig = go.Figure(data=[go.Candlestick(x=[1, 2, 3, 4, 5],
                open  = [ 1, 6, 7, 10, 5 ],
                close = [ 2, 10, 3, 12, 8  ],
                high  = [ 10, 12, 8, 15, 18 ],
                low   = [ 0.1, 5, 2, 8, 5 ],                                                                               
                )])

fig.show()


# 설명에 있는 대로 옵션을 조금씩 바꿔 보도록 하겠습니다.

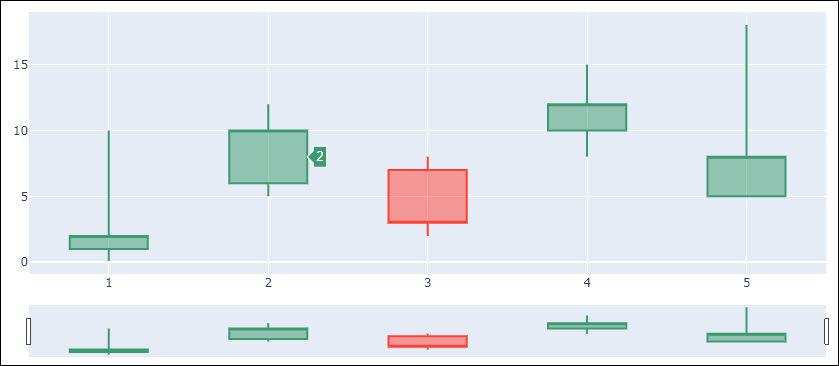
hoverinfo = 'x'


hoverinfo = 'y'

hoverinfo = 'z'

# z 값은 3차원 그래프에서 적용되는 듯 한데요. 적용을 해도 아무 표시도 뜨지 않네요.

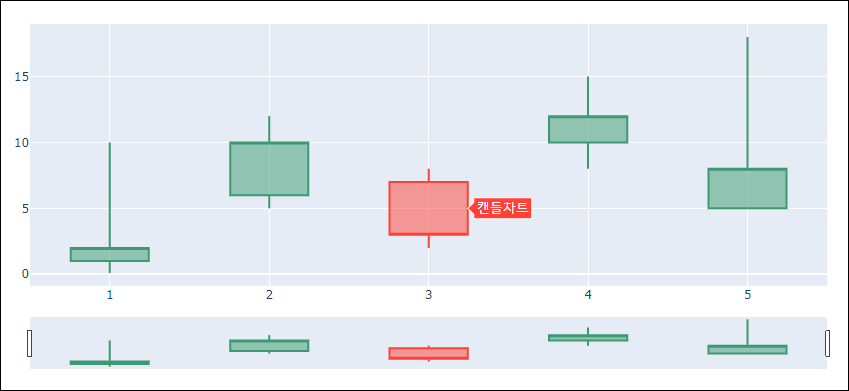
hoverinfo = 'text'

# 이 옵션은 text 값을 별도로 넣어주어야 합니다.

import plotly.graph_objects as go

fig = go.Figure(data=[go.Candlestick(x=[1, 2, 3, 4, 5],
                open  = [ 1, 6, 7, 10, 5 ],
                close = [ 2, 10, 3, 12, 8  ],
                high  = [ 10, 12, 8, 15, 18 ],
                low   = [ 0.1, 5, 2, 8, 5 ],     
                text = '캔들차트',
                hoverinfo = 'text'
                )])

fig.show()

# 여기서 text 파라미터에 대해서 함께 살펴보면 text 에는 list 형태로도 올수 있다고 합니다.

# 리스트에 각각의 값을 넣어주면 캔들마다 표시가 됩니다. 다시 말해 위와 같이 text='캔들차트' 하나만 넣게 되면 모든 캔들에 '캔들차트'라고 뜨지만 아래와 같이 리스트로 정해주면 정해준 숫자만큼 앞에서 부터 지정이 됩니다.

# 뒤쪽에 지정안된 캔들은 표시가 안됨.


property text 

Sets hover text elements associated with each sample point. If a single string, the same string appears over all the data points. If an array of string, the items are mapped in order to this trace’s sample points. 

The ‘text property is a string and must be specified as: 

  • A string 
  • A number that will be converted to a string 
  • A tuple, list, or one-dimensional numpy array of the above 

Returns 

Return type 

str|numpy.ndarray 

text = ['캔들1', '캔들2']


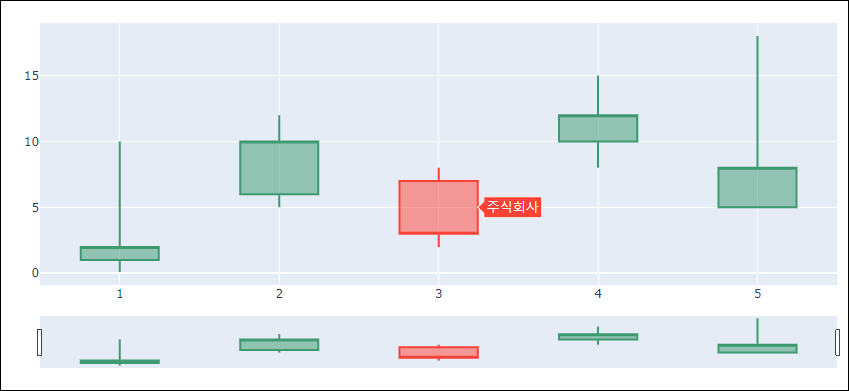
# name 옵션은 범례를 표시한다고 생각하시면 됩니다. 이것 또한 모든 캔들위에 저것만 표시가 됩니다.

name = '주식회사',
hoverinfo = 'name'

property name 

Sets the trace name. The trace name appear as the legend item and on hover. 

The ‘name property is a string and must be specified as: 

  • A string 
  • A number that will be converted to a string 

Returns 

Return type 

str 


# 조합을 통해서도 나타낼 수 있습니다.

hoverinfo = 'x+y'

# 초기 셋팅이랑 동일합니다.

# 하나만 더 해보자면

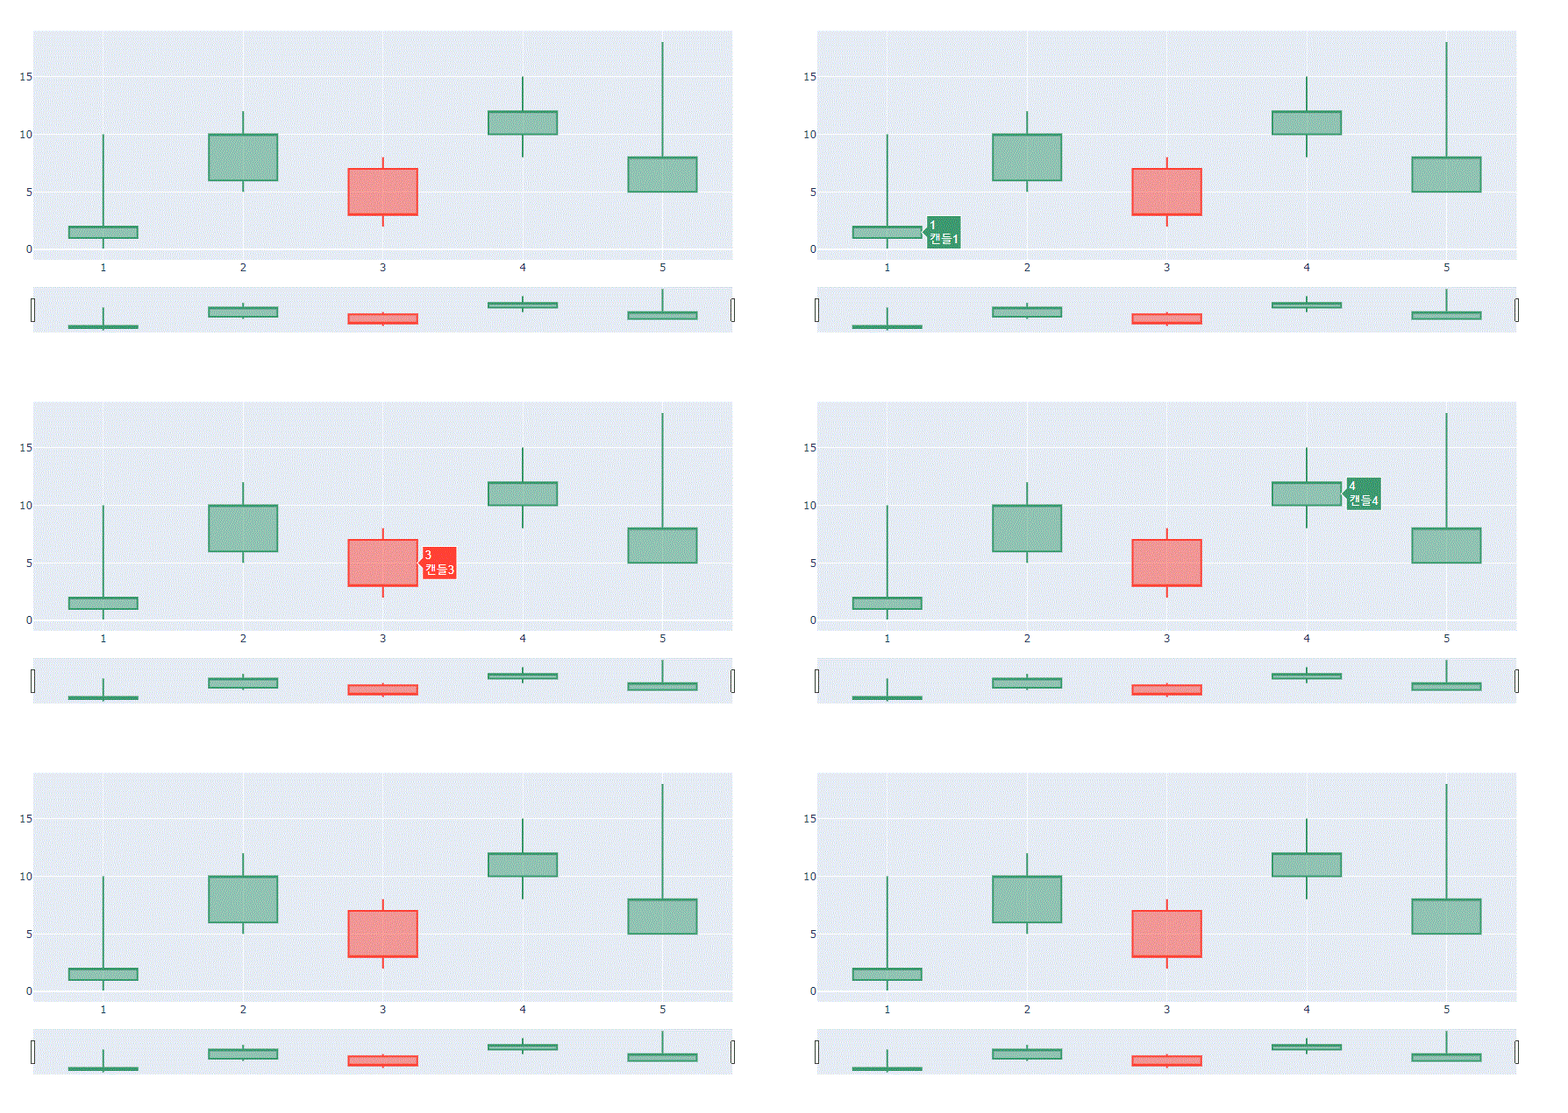
text = ['캔들1', '캔들2', '캔들3', '캔들4', '캔들5'],
hoverinfo = 'x+text'

# 이런식으로도 조합이 가능합니다.

# x+y, y+text, x+name 등등 필요 용도에 따라 조합해서 사용하시면 될듯합니다.


# 그리고 all, none, skip 이 있습니다. none과 skip 은 어떠한 정보도 표시하지 않습니다.

# all은 아래와 같이 모든 정보가 표시됩니다.

name = '주식회사',
text = ['캔들1', '캔들2', '캔들3', '캔들4', '캔들5'],
hoverinfo = 'all'

# 이렇게 하나씩 살펴보니 참 다양한 옵션들이 있네요. 정작 주식을 잘하기 위해서 이게 무슨 쓸모가 있을지는 모르겠지만..^^;; 오늘도 이렇게 하나씩 공부를 해나간다는 생각으로 앞으로 나아가겠습니다.


[이전글]

2021/02/17 - [Programming/Python] - plotly-01 #Candlestick Charts 살펴보기

2021/02/19 - [Programming/Python] - plotly-02 #Candlestick Parameters 살펴보기1-decreasing

728x90
반응형
:
Posted by 패치#노트
728x90
반응형


[Candlestick Documentation]

plotly.github.io/plotly.py-docs/generated/plotly.graph_objects.Candlestick.html


# 상기 주소로 가서 Candlestick class 의 parameter 을 살펴보면 다양한 종류가 있습니다.


# 이전 살펴보기에서 어떤식으로 간략히 그릴수 있는지 살펴봤었고, x, close, high, open, low 값을 통해 그릴 수 있었습니다.

# 이외에도 다양하게 있는데 하나씩 살펴볼려고 합니다.

* 찾아봐도 모르겠는건 과감히~~^^ pass~~^^;;;;;;;;;;;; 누가 좀 알려주세용~^^


* close – Sets the close values.

# 종가 가격


* closesrc – Sets the source reference on Chart Studio Cloud for close .

# Chart Studio Cloud 에서 어떤 셋팅을 하는 것 같다. 주피터에서는 별다른 작동을 안함.


* customdata – Assigns extra data each datum. This may be useful when listening to hover, click and selection events. Note that, “scatter” traces also appends customdata items in the markers DOM elements

# unknown function ^^;;


* decreasing – plotly.graph_objects.candlestick.Decreasing instance or dict with compatible properties 

* class plotly.graph_objects.candlestick.Decreasing(arg=None, fillcolor=None, line=None, **kwargs)

plotly.graph_objects.candlestick package — 4.14.3 documentation

# decreasing 은 캔들에서 떨어가지는 캔들에 대한 fillcolor 와 line 에 대한 정의를 할 수 있습니다.


Bases: plotly.basedatatypes.BaseTraceHierarchyTypeproperty fillcolor

Sets the fill color. Defaults to a half-transparent variant of the line color, marker color, or marker line color, whichever is available.

The ‘fillcolor’ property is a color and may be specified as:

  • A hex string (e.g. ‘#ff0000’)
  • An rgb/rgba string (e.g. ‘rgb(255,0,0)’)
  • An hsl/hsla string (e.g. ‘hsl(0,100%,50%)’)
  • An hsv/hsva string (e.g. ‘hsv(0,100%,100%)’)
  • A named CSS color:aliceblue, antiquewhite, aqua, aquamarine, azure, beige, bisque, black, blanchedalmond, blue, blueviolet, brown, burlywood, cadetblue, chartreuse, chocolate, coral, cornflowerblue, cornsilk, crimson, cyan, darkblue, darkcyan, darkgoldenrod, darkgray, darkgrey, darkgreen, darkkhaki, darkmagenta, darkolivegreen, darkorange, darkorchid, darkred, darksalmon, darkseagreen, darkslateblue, darkslategray, darkslategrey, darkturquoise, darkviolet, deeppink, deepskyblue, dimgray, dimgrey, dodgerblue, firebrick, floralwhite, forestgreen, fuchsia, gainsboro, ghostwhite, gold, goldenrod, gray, grey, green, greenyellow, honeydew, hotpink, indianred, indigo, ivory, khaki, lavender, lavenderblush, lawngreen, lemonchiffon, lightblue, lightcoral, lightcyan, lightgoldenrodyellow, lightgray, lightgrey, lightgreen, lightpink, lightsalmon, lightseagreen, lightskyblue, lightslategray, lightslategrey, lightsteelblue, lightyellow, lime, limegreen, linen, magenta, maroon, mediumaquamarine, mediumblue, mediumorchid, mediumpurple, mediumseagreen, mediumslateblue, mediumspringgreen, mediumturquoise, mediumvioletred, midnightblue, mintcream, mistyrose, moccasin, navajowhite, navy, oldlace, olive, olivedrab, orange, orangered, orchid, palegoldenrod, palegreen, paleturquoise, palevioletred, papayawhip, peachpuff, peru, pink, plum, powderblue, purple, red, rosybrown, royalblue, rebeccapurple, saddlebrown, salmon, sandybrown, seagreen, seashell, sienna, silver, skyblue, slateblue, slategray, slategrey, snow, springgreen, steelblue, tan, teal, thistle, tomato, turquoise, violet, wheat, white, whitesmoke, yellow, yellowgreen

ReturnsReturn type

str

property line

The ‘line’ property is an instance of Line that may be specified as:

  • An instance of plotly.graph_objects.candlestick.decreasing.Line
  • A dict of string/value properties that will be passed to the Line constructorcolorwidth
  • Sets the width (in px) of line bounding the box(es).
  • Sets the color of line bounding the box(es).
  • Supported dict properties:

ReturnsReturn type

plotly.graph_objects.candlestick.decreasing.Line


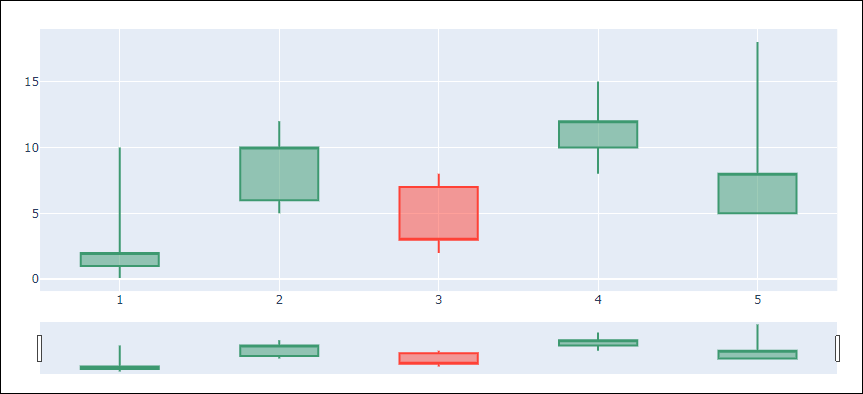
# 우선 여기서 비교를 위해서 아래와 같이 주피터 노트북으로 간단한 캔들차트를 그려보았습니다.

import plotly.graph_objects as go

fig = go.Figure(data=[go.Candlestick(x=[1, 2, 3, 4, 5],
                open  = [ 1, 6, 7, 10, 5 ],
                close = [ 2, 10, 3, 12, 8  ],
                high  = [ 10, 12, 8, 15, 18 ],
                low   = [ 0.1, 5, 2, 8, 5 ],                                                                                                   
                )])

fig.show()

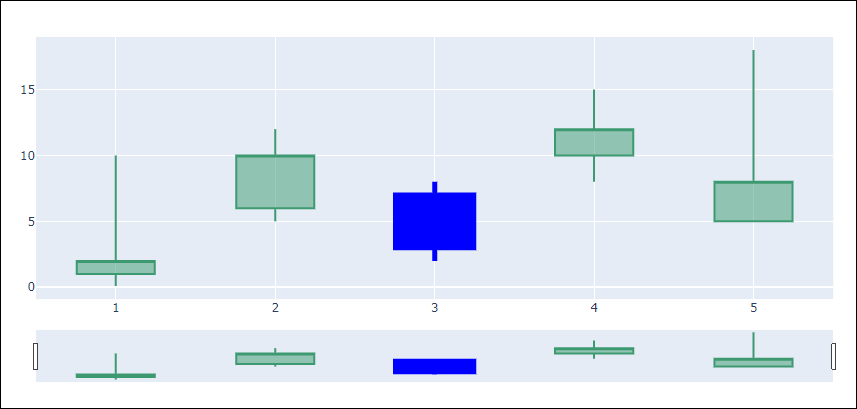
기본 차트


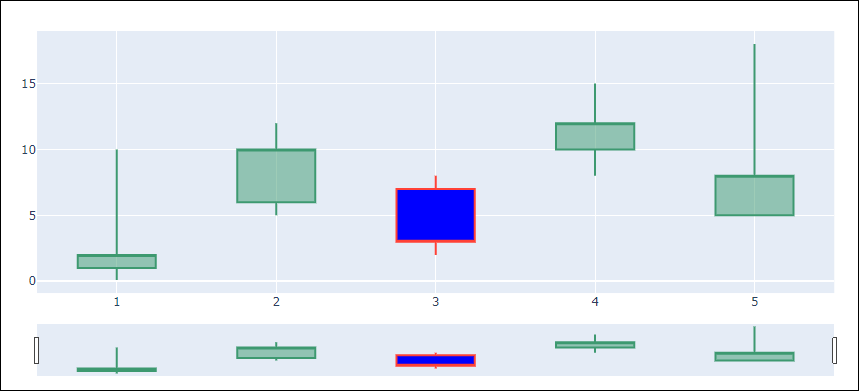
# decreasing 적용을 위해서는 아래와 같이 dict 형태로 묶어서 전달하는 해주면 됩니다.

import plotly.graph_objects as go

fig = go.Figure(data=[go.Candlestick(x=[1, 2, 3, 4, 5],
                open  = [ 1, 6, 7, 10, 5 ],
                close = [ 2, 10, 3, 12, 8  ],
                high  = [ 10, 12, 8, 15, 18 ],
                low   = [ 0.1, 5, 2, 8, 5 ],                                                               
                decreasing = dict(fillcolor='blue')                                                     
                )])

fig.show()

# decreasing 의 fillcolor 는 위의 설명에서 보듯, rgd 코드, css 타입등등으로 넣을 수 있습니다. 전, 익숙한 blue 로 색을 채워보았습니다.


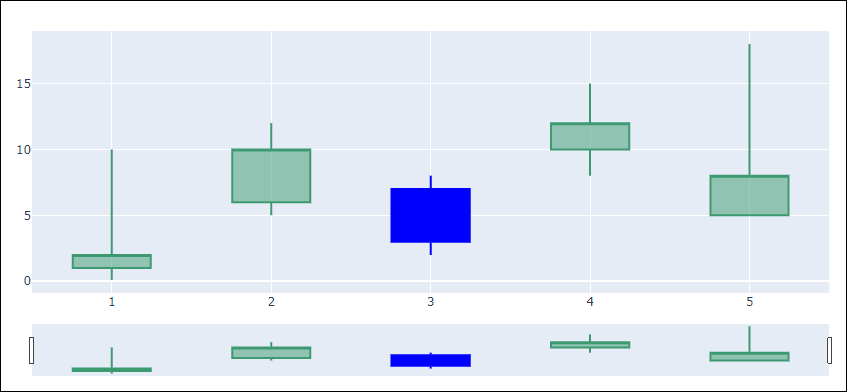
# 선이 아직도 빨간색이라서 선도 파란색으로 넣어 보겠습니다.

# 선 또한 rgb, hex 등등으로 색을 변경할 수 있습니다.

import plotly.graph_objects as go

fig = go.Figure(data=[go.Candlestick(x=[1, 2, 3, 4, 5],
                open  = [ 1, 6, 7, 10, 5 ],
                close = [ 2, 10, 3, 12, 8  ],
                high  = [ 10, 12, 8, 15, 18 ],
                low   = [ 0.1, 5, 2, 8, 5 ],                                                               
                decreasing = dict(fillcolor='blue', line=dict(color='blue'))                                                     
                )])

fig.show()

# 선의 굵기도 조정할 수 있습니다.

line=dict(color='blue', width=5)

# 5정도로 하면 아래와 같습니다.

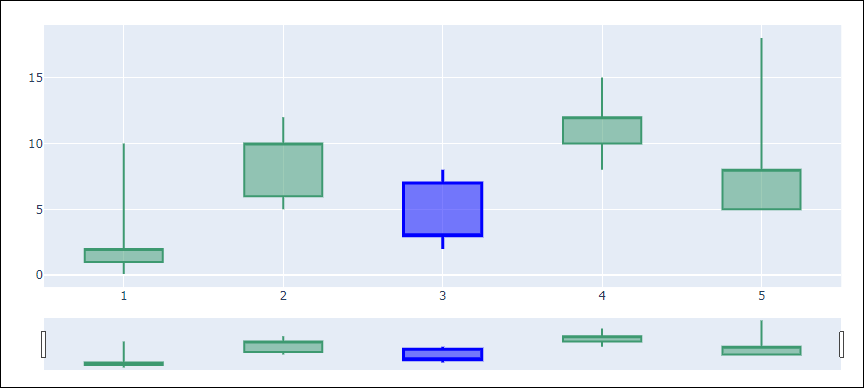
# 여기서 alpha 값을 줘서 파란색을 배경이 보이는 형태로 만들고 싶으면. rgba 를 사용하면됩니다.

# rgb 표 색상은 구글에 검색하시면 엄청 잘 나와있어요~^^

fillcolor='rgba(0,0,255,0.5)'

# rgba(red, green, blue, alpha) 값을 나타냅니다. alpha 를 0.5 정도로 적용하면 아래와 같습니다.

# alpha 값은 0.0 (투명) ~ 1.0 (불투명) 으로 보시면 됩니다.


[이전글]

2021/02/16 - [Programming/Python] - plotly-00 #시작

2021/02/17 - [Programming/Python] - plotly-01 #Candlestick Charts 살펴보기

728x90
반응형
:
Posted by 패치#노트
728x90
반응형

# 시작에 이어서 우리에게 필요한(?) 캔들 차트 그리기를 알아보도록 하겠습니다.


# 오늘도 스스로를 위한 공부시작!!!!


# 오늘도 소스는 plotly 공식 사이트를 참고해 보았습니다.


[참고 사이트]

plotly.com/python/candlestick-charts/


# 주식 정보들을 다루다 보면 필연적으로 pandas 와 많이 부딪치게 되는 것 같습니다. pandas 에 정보를 담아서 주가를 그려보도록 하겠습니다.

# 주가 데이터셋 또한 plotly 에서 제공해주기 때문에 연습할 때 용이합니다.

# 전체코드
import plotly.graph_objects as go

import pandas as pd
from datetime import datetime

df = pd.read_csv('https://raw.githubusercontent.com/plotly/datasets/master/finance-charts-apple.csv')

fig = go.Figure(data=[go.Candlestick(x=df['Date'],
                open=df['AAPL.Open'],
                high=df['AAPL.High'],
                low=df['AAPL.Low'],
                close=df['AAPL.Close'])])

fig.show()

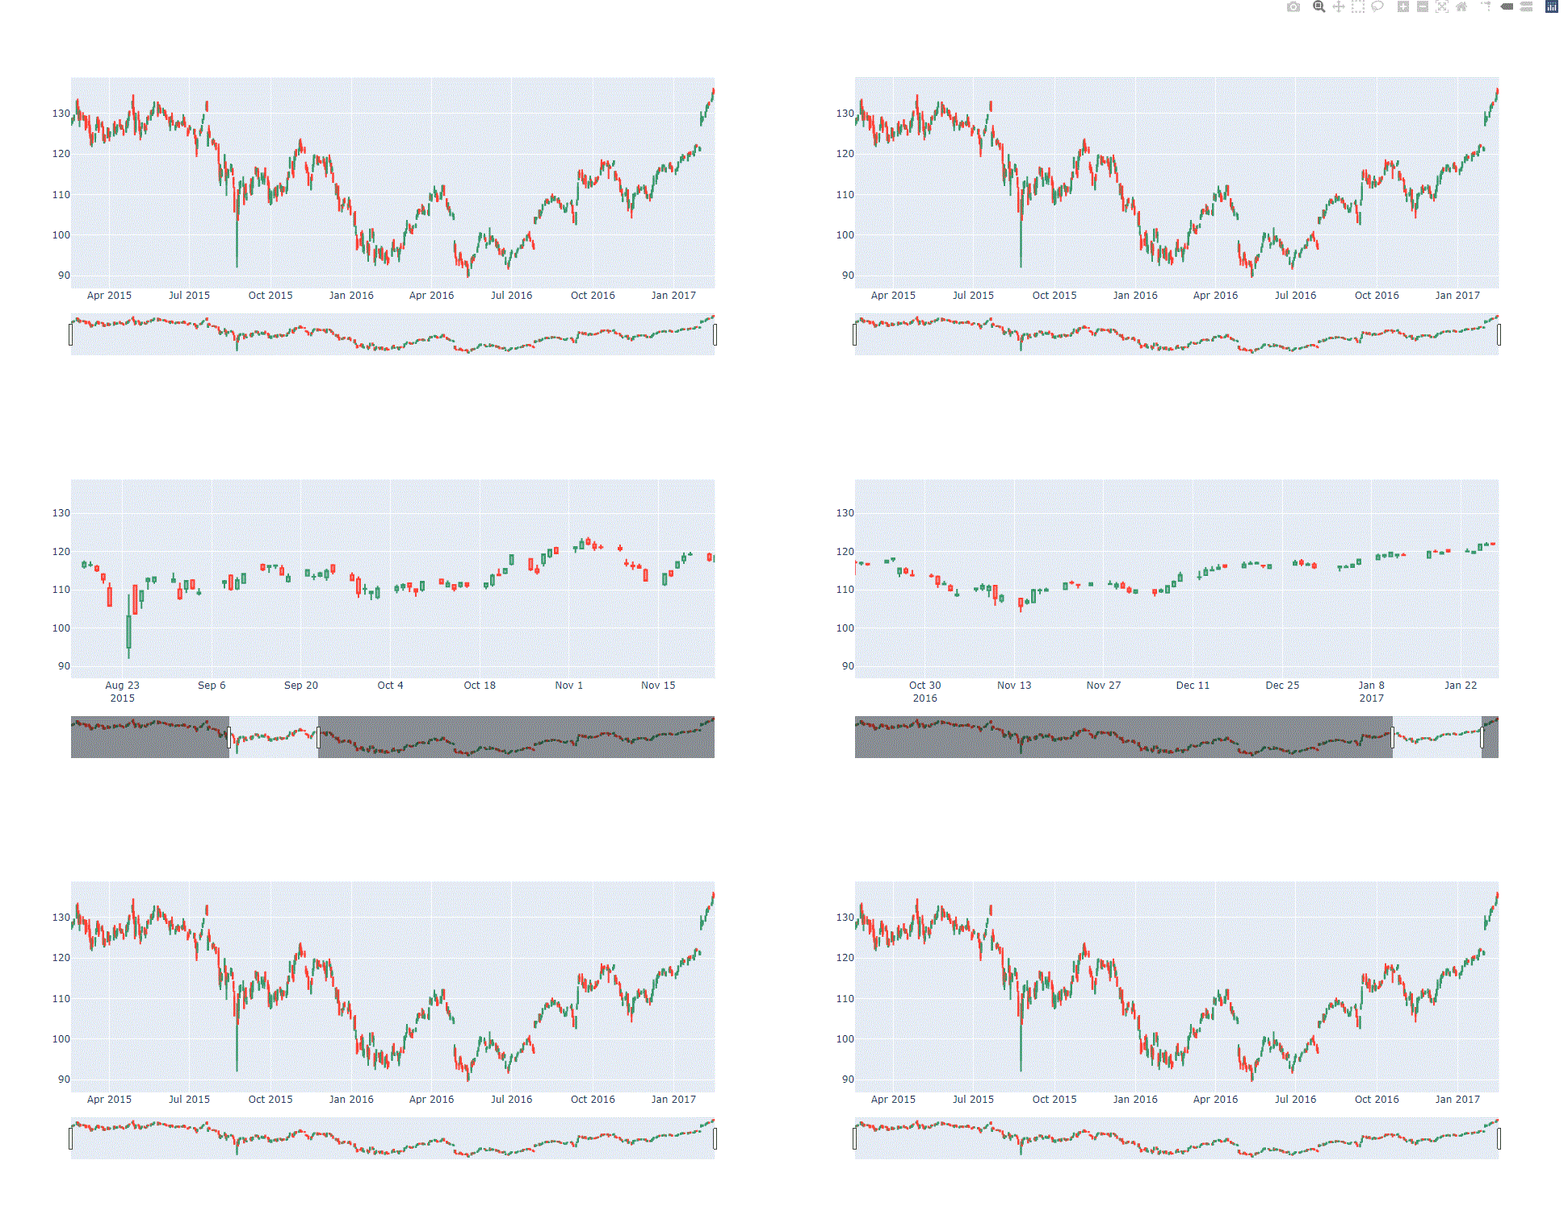
차트 예시

# 실행해보면 밑에 컨트롤바와 함께 이쁜 차트가 자동으로 완성됩니다.

# 마수를 캔들위에 놓으면 캔들의 시가, 고가, 종가, 저가를 알수가 있고, 아래의 컨트롤바를 움직이면 확대하거나 해서 원하는 시간대로 이동할수도 있습니다.


[코드 살펴보기]


import plotly.graph_objects as go

# import 를 해주는 것이고, as 는 보통 go 로 통상적으로 많이 사용하고 있습니다.

import pandas as pd

# pandas 도 import

# 만약 설치가 안되어있다면 jupyter notebook 에서 아래와 같이 설치하여 실행하시기 바랍니다.

!pip install pandas
from datetime import datetime

# datetime 은 왜 import 했는지 모르겠네요~^^ 사이트에서 제공하는 코드소스인데도.. 뭔가 쓸데 없는 것이..~^^;;;;

# 사용을 하지 않으므로 주석처리 또는 삭제 처리 해주셔도 되네요.

df = pd.read_csv('https://raw.githubusercontent.com/plotly/datasets/master/finance-charts-apple.csv')

# dataframe 형태로 사이트에서 제공해주는 데이터셋을 불러와 정보를 담습니다.

fig = go.Figure(data=[go.Candlestick(x=df['Date'],
                open=df['AAPL.Open'],
                high=df['AAPL.High'],
                low=df['AAPL.Low'],
                close=df['AAPL.Close'])])

# 정보를 불어모녀 x축과 y축에 각각 정보를 줘야 합니다. fig에 위와 같이 x 축에는 날짜 항목을 불러오고, y축에는 open(시가), high(고가), low(저가), close(종가) 불러 옵니다. 여기서는 애플의 주가를 불러왔나보네요.

fig.show()

# 마지막으로 정보 불러온것을 보여줍니다.

# mpl_finance 를 이용해서 candlestick 을 그리시는 분들도 있지만. 저는 plotly 가 더 저한테는 맞는것 같더라구요. ^^


# 다음에도 plotly 사이트에 있는 문서들을 좀 더 살펴보고 하나씩 하나씩 공부해 나가도록 하겠습니다.


[이전글]

2021/02/16 - [Programming/Python] - plotly-00 #시작

728x90
반응형
:
Posted by 패치#노트
2021. 2. 16. 09:52

파이썬 차트, plotly-00 #시작 Programming/Python2021. 2. 16. 09:52

728x90
반응형

# 파이썬으로 주식 데이터를 분석하다면 그래프를 무조건 사용하게 되어 있다.

나는 초창기에 기본적인 matplotlib을 가지고 시도했었으나 plotly 를 알고 나서부터는 이것만 사용하게 되었다.


# 가장 큰 차이점은 matplotlib 의 경우 주가 데이터를 그리더라도 활용도가 plotly 보다 훨~~~~씬 뒤처지는 개인적인 느낌이 있어서 plotly만 사용하고 있는 중이다.

 추후에 더 좋은 것이 나온다면..... 음...~ move move~~


# 오늘은 시작하는 느낌으로 기초부터 시작하고

점점 내가 활용하고 있는 단계까지 작성을 해볼려고 한다.


# 나를 위한 공부 start!!!!


[설치]

pip install plotly

만약 주피터 노트북을 사용한다면

!pip install plotly


[공식 사이트]

plotly.com/


Plotly: The front end for ML and data science models

Plotly creates & stewards the leading data viz & UI tools for ML, data science, engineering, and the sciences. Language support for Python, R, Julia, and JavaScript.

plotly.com

# 대부분 Jupyter notebook을 활용해서 그래프를 그리고 있으므로 Jupyter notebook 위주로 설명


plotly.com/python/getting-started/

[그래프 그려보기]

import plotly.graph_objects as go
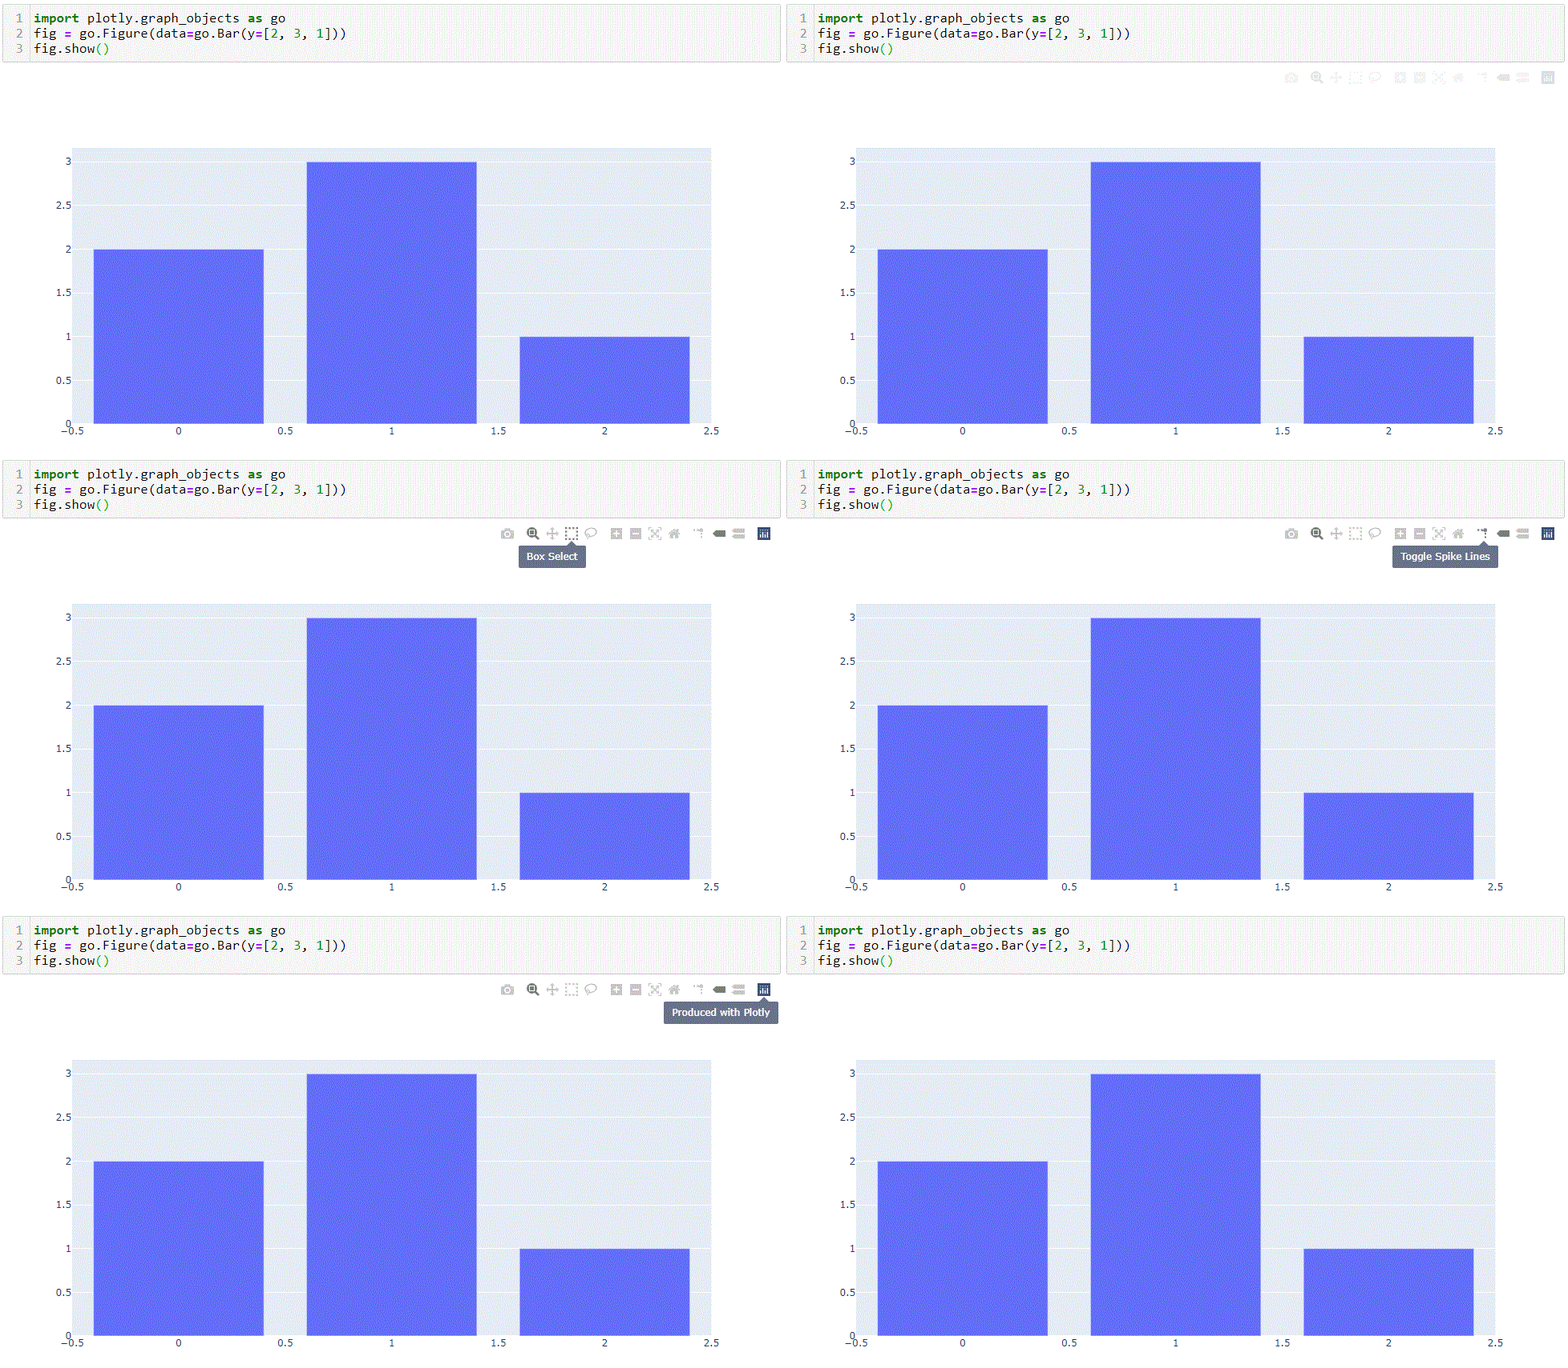
fig = go.Figure(data=go.Bar(y=[2, 3, 1]))
fig.show()


Jupyter notebook 구현

# matplotlib은 이미지를 화면에 찍어내지만, plotly 는 위와 같이 쉽게 active 하게 그릴 수 있다.

728x90
반응형
:
Posted by 패치#노트